Email Settings

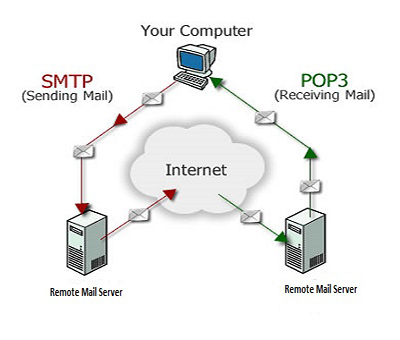
Please follow the instructions below so that you can setup the Incoming POP3 Email Server.
A note about changing over
A system called DNS is used to find the correct server to send your incoming emails to. When a change is made to DNS, it can take a while (from hours to a few days) to reflect everywhere around the World. In order to ensure that you do not lose any emails during the transition, setup the email server without deleting the old email settings and let both run together for about a week before deleting the old email server’s settings.
Your New Settings
The information below explains how to setup the POP3 and SMTP server settings for Outlook, which is the most popular mail client. Other mail clients have similar settings and you should find this information useful in setting them up also.


- Open Outlook.
- If you want your emails on the new server to go to your existing mailbox file then
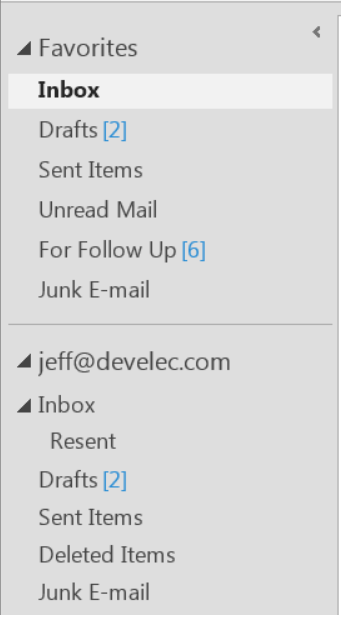
- Right-click the root of your mailbox and choose Data File Properties – The root entry is jeff@develec.com in the example on the right
- Click the Advanced button
- Make a note of the Filename so that you can select it later
- Click Cancel and Cancel again
- Click on the File Tab at the top left.
- Click on the Account Settings button and then on the Account Settings drop-down menu.
- The Account Settings window will open.
- Make sure that you have selected the Email Tab and click New.
- The Add Account dialogue will open.
- Choose Manual setup or additional server types (at the bottom) and click Next.
- Select POP or IMAP and click Next.
- Enter your Name (this is the name that will display in your messages) and your Email Address.
- Ensure that the Account Type is POP3 – do not select IMAP.
- Enter the name of the POP3 server: smtp.develec.co.za.
- Enter the name of the SMTP server: smtp.develec.com.
- Enter your full email address in the User Name field.
- Enter the new password in the email that has been sent to you about this upgrade.
- Ensure that Remember password and Secure Password Authentication (SPA) are ticked.
- You can create a new Outlook Data File or you can choose to use your existing mailbox file (see above).
- Do not click Next yet but click More Settings.
- Check the Mail Account name – it will be used to identify the account during sending and receiving.
- You can change the account name if you want to.
- Enter your Organisation – optional.
- Enter you Reply Email Address only if you want replies to your emails to go to a different address.
- Select the Outgoing Server tab.
- Tick My outgoing server (SMTP) requires authentication.
- Select Use the same settings as my incoming server.
- Select the Advanced tab.
- Tick This server requires an encrypted connection (SSL).
- The incoming server (POP3) port should change to 995 automatically.
- Change the Outgoing Server Port to 587
- Select TLS (use STARTTLS if included in the list) from the encryption pull-down list.
- Remove the tick from Leave a copy of messages on the server until the old server settings are removed (see the note below).
- Click OK and the Internet Email Settings window will close.
- Click Test Account Settings.
- If you do not see two green ticks, you have an error. Please go back and check all of your settings.
- Uncheck Automatically test account settings…
- Click Next and then Finish.
- Congratulations, you have completed the new account setup.
Do not delete your old settings yet.
You will need to use your old settings and your new settings at the same time
for about three days after the DNS changeover to ensure that you do not lose any emails.
Thereafter, you can delete your old settings.
You will need to use your old settings and your new settings at the same time
for about three days after the DNS changeover to ensure that you do not lose any emails.
Thereafter, you can delete your old settings.
Troubleshooting – Outlook may download emails more than once
Please note that while you have the old email server settings enabled, you may find that Outlook downloads the same email more than once if you delay deletion of emails from the server. You can tell Outlook to delete emails after downloading them immediately to solve this problem. Once you delete the old server settings, you can delay deletion again.
Spam
The reputation of any server that sends emails is vitally important because it prevents its users’ emails from being relegated to recipients’ spam folders.
No-spam Policy
In order to protect our clients, we have an extremely strict no-spam policy.
Please do not send unsolicited emails (e.g. advertising emails, etc) using our SMTP server.
Any email account found to be sending spam will be permanently deleted, without notice.
Please do not send unsolicited emails (e.g. advertising emails, etc) using our SMTP server.
Any email account found to be sending spam will be permanently deleted, without notice.
Bulk Emails
If you wish to send out advertising, promotional emails and / or newsletters, there are a number of bulk mailing companies that specialise in providing this service without your domain, email account and / or our server being blacklisted. There are a number of laws governing bulk emails that these companies help you to comply with. Mailchimp, Touch Base Pro, and SendBlaster are examples of bulk emailing companies (No endorsement is to be inferred).

